Saturday, January 7, 2012

pumpkin yum


I only have a few pictures to share with this wonderful recipe. I didn't have high hopes for it turning into anything edible...but it's simply delicious and came together in just minutes. Definitely taking a loaf along for our weekend trip to St. Catherine's to visit with an old family friend of Drew's! 


pumpkin bread

4 eggs
1 c oil
1 15oz can pumpkin
1 c orange juice
1 1/3 c brown sugar
1 1/3 c white sugar
Beat all ingredients, in order listed, in a mixer until well combined.

Then, sift together (or, I mean. who are we kidding. I just dumped them in the kitchen aid) the following ingredients.

1 1/2 t salt
2 t baking soda
2 t cinnamon
1 t ground cloves
1 t nutmeg
1 2/3 c whole wheat flour
1 1/3 c white flour (add more if the batter seems too runny)
3 T flax seeds. totally optional. I just felt like I needed something to counteract the sugar.

Mix on low speed just until combined. Alton brown fun fact: if you over mix flour into batters or doughs, it releases the gluten which makes for stiff, not so tasty snacks. Use a spatula to scrape down the sides and blend in any neglected goodness.

Spray two bread pans with pam. Now, you can just dump the batter in, divided evenly between the two pans. OR, you can read on and have something even more delicious.


Use a measuring cup to scoop about two cups of batter into each pan. Sprinkle some brown sugar, oats (um. maybe a few tablespoons of each? I definitely just eyeballed this) and a few spoonfuls of the leftover christmas cranberry sauce that's just about to go bad, hiding in the dark corner of your fridge (please don't calculate how long it's actually been there). Top with remaining batter (distributed between the two pans, of course) and sprinkle a few oats on top for flair.

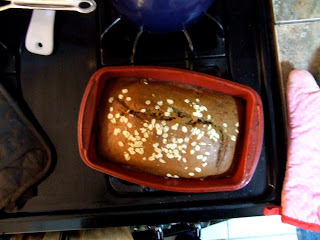
Slide those beauties into the oven and bake for about an hour at 350 degrees, or until just a bit moist inside. Let cool in pans and then slice and enjoy!

I had a wee bit of left over batter that I used to make a few muffins, baked for about 25 minutes until they were perfect, puffy, pumpkin domes.


smeared with a little buttah


The perfect blog companion. Maybe this means I'll actually do more blogging in the coming weeks...hmm...

Tuesday, November 15, 2011

chalkboard paint on a budget


I came across a 'recipe' for the paint sometime last week on Pinterest (which is the perfect solution to my tabs problem!) and started imagining all the objects in our home that could become mini-chalkboards. I've seen people paint the fronts of their fridge doors, vases, picture frames and even the bottoms of wine glasses, it seems there are just endless ways to use this fun stuff, especially when it's such a cinch to whip up a batch! J.C. was in town this weekend he took us to Home Depot to get supplies for different projects (hopefully I'll get some photos and post their progress soon!) and I managed to track down some non-sanded grout while were were there. This giant box was less than $10. I also found a cheap little can of dark purple paint in the mis-tint section. HD and most hardware stores sell paint color mess ups at a big discount, which means I got this high quality paint for a whopping $3. Including the foam brush (.87), the whole project came out under $15, compared to a can of commercial paint which is about $40 around here. The best part is that you can add the grout to any kind/color of latex or craft paint and produce the same results. Oh the possibilities...
But, down to details. 


The ratio for the paint is 2 tablespoons of grout per cup of paint. 


I tried to mix it but ended up just shaking the jar until things seemed smooth. You don't want any lumps, but the grout incorporates pretty quickly. Except for the stuff that sticks to the sides of the jar. Definitely not worth worrying about.


And, that's it! Apply your paint with a foam brush to eliminate brush stroke lines and create a smooth surface for drawing on. I wanted to make little labels on my sugar canisters, so I made little stencils out of clear packing tape.


I also painted a frame we had received as a wedding gift. I love the frame but the font and style weren't quite right for us. I thought the large open space would be a perfect spot for jotting down a memory or quote to accompany the photos. 


Here's the frame after two thin coats of paint. At this point, Drew suggested we get some black acrylic paint to darken the color a bit, especially since purple doesn't exactly go with anything else we own.


We love all the little variety shops and dollar stores near us, but they don't have the greatest selection. The only black paint was one of those small little craft bottles, so I just dumped in the whole thing and shook it up.  I'm not sure if acrylic and latex are supposed to mix, but it all seemed to incorporate well together. 


I applied another coat in the slightly darker color and left it to dry while Drew and I headed to a vespers service downtown with friends. It turned out to be an intimate Bach concert that was absolutely incredible! Afterwards we had to forgo tea and conversation so I could finish and submit another job application (ugh), but I couldn't resist testing out the finished project. 


I've read that you need to coat the whole piece in chalk before you can write on it. I used the long side of the chalk and rubbed it over the frame and jars, then wiped the excess off. 


These jars didn't really need labels, but I think it looks fun! Plus, I can change it up if I ever use them for anything else. 


And here's the finished frame with pictures. I love that I can use a different verse or quote or draw a design anytime I want, although writing neatly with dollar-store chalk is a bit of a challenge :) I think I need to invest in those neat chalk pens. Maybe I'll save that for when I create a menu board! 


And here's my other sunday afternoon craft. Yarn, wrapped around a bottle. The ultimate in kitsch, but I love it!


They're just so cozy and festive in fall colors. 


We're trying to get things up on the walls and ready for our next visitors (that's you, kels, kayla and liz!).  Drew and I pulled out all our wedding photos this weekend and arranged them in frames. It was so fun to remember everyone coming together to celebrate with us and it brings a bit of comfort at being so far away from those we love. Anyway, I'll take some photos when they're all up!

Friday, September 16, 2011

Carrot and Sweet Potato Soup

The best way to make great friends in a new city is probably to rent an apartment from them. Then, have them over for cupcakes (this will force you to sort of clean your living room and unpack some boxes) while they examine the bubble under your countertop. Invite them over for dinner later in the week. When they trek downstairs to join you, woo them with lots of fresh warm bread, drink their good wine and enjoy three hours of delightful conversation!
If possible, plan dinner on a crisp fall evening. Then make this soup. 


It started with these beauties.


and these. all orange


shed of their skins. makes a messy sink.


 then this beauty, chopped into quarters. read this short bit of this before you go any further.


 douse in balsamic, olive oil, and savory spices. 


roast for 40 min, stir a few times. when tender, remove from oven and enjoy the comforting smell of spicy, earthy goodness


grab that bag of leftover bread dough from the fridge and let it come to room temp


 then shape your loaf (or loaves) and cut those satisfying gashes!
bake for 20-30ish minutes, until browned and lovely


 remove it from the oven, cover with a towel and shove an emersion blender in your husband's hands to keep his hands off the bread


sneak a picture while he's cleaning the living room. get excited about your dinner guests!


reheat the soup, stir and serve!

a perfect fall comfort food


feel grown up and fancy for stacking your bowl on a plate (even though it will awkwardly force your guests to choose between eating their soup or their greens)


wake up late the next morning and discover that your darling husband has done all the dishes! (letting him polish off the bread after your guests leave will help make this a reality)

Carrot and Sweet Potato Soup
adapted from Joy and Sisters


Serves: lots. At least 10


Ingredients:
10 large carrots
4 small onions (or two medium onions of any sort)
4 medium sized sweet potatoes 
Olive and Balsamic Vinegar to lightly coat (a few tablespoons of each)
2 T of curry powder
2 T of cumin
a shake of red pepper flakes
1 t of paprika
7-8 cups of chicken broth
1 can coconut milk
1/2 c whole milk (or half & half )
small knob of chopped ginger (about 3-4 tablespoons)

Peel and chop your veggies into same-sized chunks for roasting. Toss the onions, carrots and sweet potatoes in a large bowl with olive oil, balsamic, salt and pepper and spices. Roast for 40 minutes in a 425 degree oven. Stir once or twice. 
Remove from oven, check to see if the veggies are fork tender. Scoop veggies into a large stock pot, add liquids and chopped ginger. Blend together with immersion blender, or in small batches in a food processor or blender. After blended smooth, reheat and stir occasionally. Taste to check spices and add more of whatever you think it needs.
Eat with lots of fresh bread.

Thursday, September 15, 2011

crusty bread

With all this time on my heads and this gorgeous fall weather, what's a girl to do but bake?


I've been wanting to try again with yeasty breads but not had much luck in the past, but the fancy (read: cheap) pizza stone we found at bed bath and beyond bolstered my courage. You do all sorts of strange things for this bread, like heat the oven to 450 degrees and bake the stone for a while, and then once you put the bread on it, you dump a cup of hot water into your broiler pan to create a bunch of steam that will give a nice crunch to the bread. This also makes you jump back in terror as steam billows out of the oven and your gas stove protests with massive flames jumping out from beneath. 


But then, 20 min later, you have a gorgeous loaf!


So. From the NY Times:


total time: About 45 minutes plus about 3 hours’ for resting and rising

ingredients:
1 1/2 tablespoons yeast
1 1/2 tablespoons kosher salt
6 1/2 cups unbleached, all-purpose flour, more for dusting (and by dusting, I mean blizzarding. my dough was super sticky after rising) dough
Cornmeal. for the pan.
1. In a large bowl mix yeast and salt into 3 cups lukewarm water (about 100 degrees). 

Stir in flour, mixing until the spoon gets stuck. Dough will be quite loose.


Cover, but not with an airtight lid. Let dough rise at room temperature 2 hours. Mine was exploding out of this massive bowl after just an hour, must be something about the yeast up here. It's like those little spongy pill-sized creatures you put in the bathroom sink before bed as a kid and then by morning they're a massive 6 inches and really ugly. Except this dough was really pretty and could not double as a bath toy. 


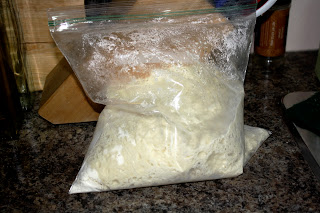
2. Bake at this point or refrigerate, covered, for as long as two weeks. (I've got half of my batch in gallon sized zip-lock awaiting a dinner with our landlords tonight...and it's still rising!) 
When you're ready for some hot-from-the-oven deliciousness, sprinkle a whole lot of flour on the dough (and coat your hands) and cut off  a grapefruit-size piece wrestle off whatever you can grab as your hands get consumed with goo. Turn dough in hands to lightly stretch surface, and attempt to create a domed top by folding the edges underneath the dough. Put dough on pizza peel (or, you know. the counter covered with some parchment or a thin cutting board) sprinkled with cornmeal; let rest 40 minutes. Repeat with remaining dough or refrigerate it. You'll want to make sure you use lots of cornmeal and check for sticking while it rests because 'rests' here actually translates as 'balloons to 4x it's size'. 
3. Place broiler pan (or any pan) on bottom of oven. Place baking stone on middle rack and turn oven to 450 degrees; heat stone at that temperature for 20 minutes.
4. Dust dough with flour, slash top with serrated or very sharp knife three times (this is extremely satisfying). 
Slide onto stone. Good luck with that. 
Pour one cup hot water into broiler pan and shut oven quickly to trap the steam which will billow out at you. 
Jump back and don't drop your pyrex measuring cup in your startled surprise. 
Bake until well browned, about 30 minutes.
Cool completely.  Eat immediately, slathered in butter. 
Yield: 4 loaves.

If you don't got a pizza stone: Make on oval out of the dough and place in a greased, nonstick loaf pan. Let rest 40 minutes if fresh, an extra hour if refrigerated. Heat oven to 450 degrees for 5 minutes. Place pan on middle rack.


this final shot is from Jeanette's beautiful canon camera - she's kind enough to let me borrow it and capture some prettier pictures of delicious things!
yum yum yum!

Tuesday, September 13, 2011

well.

A blog! If we can't actually enjoy crafting/cooking/baking/etc etc all together in the same room, I'd at least like to enjoy pictures and stories of what you're all up to!

So.
Since getting our kitchen unpacked (basically the only thing to be completely out of boxes and functional) I've been cooking like crazy and freezing lots of soups and breads. I'll try to post a few pictures and recipes of the good ones sometime soon. I stumbled across a pumpkin cupcake recipe that is nothing short of divine!

What about you all? Any craft inspiration at Renegade this week? I've finally got my mom's old sewing machine and I can't wait to use it!

kitchen tour photos to come soon!

love you all,
julianne